
DIY Slow Irrigation Method
A simple, low-cost way to water your plants efficiently
Watering plants every day can be time-consuming — and sometimes wasteful. A DIY slow irrigation system allows water to be released gradually into the soil, keeping plant roots consistently hydrated while reducing evaporation and runoff.
This method is perfect for:
- Vegetable gardens
- Potted plants
- Raised beds
- Hot climates
- Busy schedules
- Vacation watering backup
Let’s walk through how to create your own slow irrigation system step by step.
💧 Why Slow Irrigation Works
Slow watering allows moisture to:
- Soak deep into the root zone
- Reduce water waste
- Prevent soil erosion
- Lower the risk of fungal disease (by avoiding wet leaves)
- Improve plant growth and drought resistance
Plants thrive when roots grow deeper — and deep watering encourages exactly that.
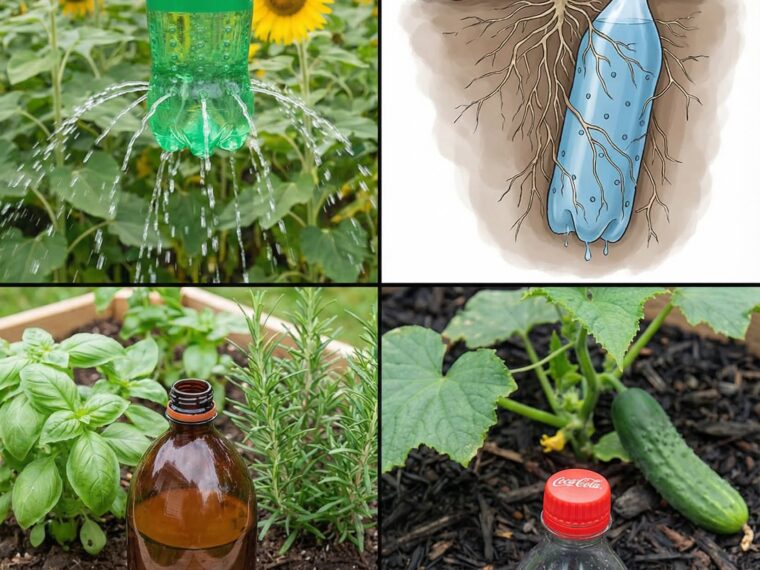
🥤 Method 1: Plastic Bottle Drip Irrigation (Most Popular)
🛒 Materials
- Empty plastic water or soda bottles (1–2 liter size)
- Small nail or needle
- Lighter (optional)
- Water
- Garden trowel
🔨 Step-by-Step Instructions
1️⃣ Clean the Bottle
Rinse thoroughly to remove sugar residue.
2️⃣ Create Small Holes
Use a heated nail or needle to poke 2–4 tiny holes near the bottom of the bottle.
Smaller holes = slower drip.
3️⃣ Fill with Water
Fill bottle completely.
4️⃣ Position in Soil
Dig a small hole next to your plant (2–3 inches away from stem).
Insert bottle upside down with the cap on.
Bury bottom portion so holes sit below soil surface.
5️⃣ Let It Drip
Water will slowly seep into the root zone over hours or even days.
🪴 Method 2: Clay Pot (Olla) Irrigation – Traditional & Natural
This ancient technique uses unglazed clay pots buried in soil.
How It Works
- Fill unglazed clay pot with water
- Bury it up to the neck
- Cover top with lid or stone
- Water slowly seeps through porous clay
The soil draws water as needed — making it highly efficient.
This method has been used for centuries in dry regions.
🧵 Method 3: Wick Irrigation for Potted Plants
Perfect for balconies and indoor plants.
Materials
- Cotton rope or thick string
- Water container
- Plant pot
Steps
- Insert one end of cotton wick into soil.
- Place other end into water container.
- Keep water container slightly lower than pot for steady flow.
Water travels through the wick gradually into the soil.
🌞 Best Times to Use Slow Irrigation
- During heat waves
- While on vacation
- For seedlings establishing roots
- For tomatoes, peppers, cucumbers
- In sandy soils that drain quickly
⚠️ Important Tips
- Check soil moisture regularly
- Adjust hole size if water drains too quickly
- Avoid placing bottle directly against plant stem
- Replace bottles if clogged
- Clean system every few weeks
💡 Extra Upgrade Ideas
- Add liquid fertilizer to water occasionally
- Paint bottles to block sunlight (reduces algae growth)
- Connect multiple bottles along garden rows
- Use larger containers for bigger plants
🌿 Environmental Benefits
- Reduces water waste
- Encourages deeper roots
- Minimizes evaporation
- Saves time and energy
- Repurposes plastic bottles
🌟 Final Thoughts
A DIY slow irrigation method is one of the easiest gardening upgrades you can make. With minimal materials and effort, you can create a steady, efficient watering system that supports healthier plants and saves water.
Simple tools. Smarter watering. Stronger plants. 🌱💧


