
A hinged hoophouse is a versatile and practical solution for gardeners looking to extend their growing season and protect their plants from harsh weather conditions. My grandpa, an avid gardener, always swore by this method for its simplicity and effectiveness.
A hinged hoophouse is essentially a mini greenhouse that can be easily opened or closed, allowing for optimal temperature control and ventilation. This article will guide you through the process of building your own hinged hoophouse, ensuring your raised bed garden thrives year-round.
Benefits of a Hinged Hoophouse
The primary benefit of a hinged hoophouse is its ability to extend the growing season by providing a controlled environment for your plants. It protects against frost, wind, and pests, while also allowing for easy access to your garden. The hinged design means you can easily open the structure for ventilation on warm days, preventing overheating and ensuring your plants receive adequate airflow. Additionally, it can help conserve water by reducing evaporation, making it an eco-friendly choice for gardeners.
Materials and Tools Needed for Construction
To build a hinged hoophouse, you will need the following materials: PVC pipes, pipe clamps, hinges, screws, a plastic cover (such as polyethylene sheeting), and wood for the frame. Tools required include a saw, drill, measuring tape, and screwdriver. These materials are readily available at most hardware stores and are relatively inexpensive, making this project accessible for gardeners of all skill levels.
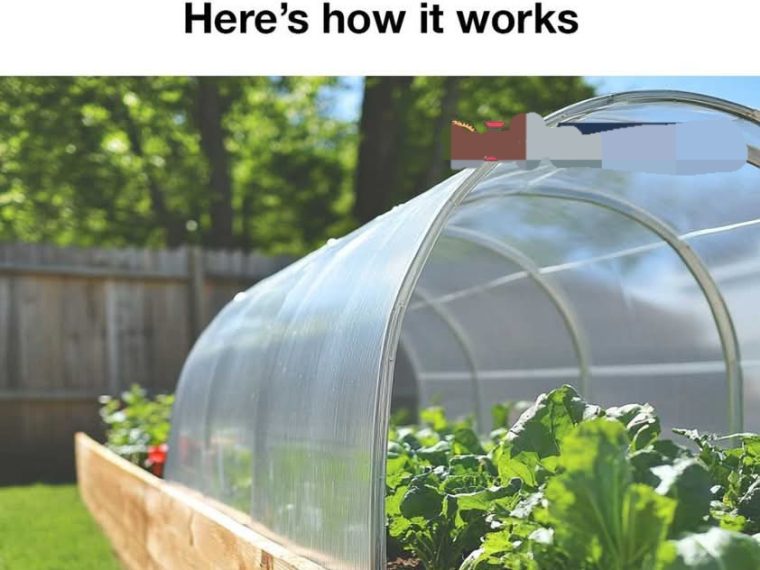
Step-by-Step Guide to Building the Hinged Hoophouse
Building a hinged hoophouse involves several key steps, from preparing your garden bed to installing the plastic cover. By following these steps carefully, you can create a functional and durable structure that will benefit your garden for years to come.
Step 1: Preparing the Raised Bed Garden
Start by ensuring your raised bed is level and sturdy. Remove any debris or weeds from the area, and make sure the soil is well-aerated and ready for planting. It’s important to have a solid foundation before adding the hoophouse structure.
Step 2: Gathering and Measuring Materials
Measure the dimensions of your raised bed to determine the size of the hoophouse. Cut the PVC pipes to the appropriate length, ensuring they will form a curved arch over the bed. Gather all necessary materials and tools before beginning construction.
Step 3: Constructing the Hoophouse Frame
Using the cut PVC pipes, create arches by bending them over the raised bed. Secure each end of the pipe to the sides of the bed using pipe clamps. Space the arches evenly along the length of the bed to provide adequate support for the plastic cover.
Step 4: Attaching the Hinges
Attach hinges to the wooden frame that will serve as the base of the hoophouse. Secure the other side of the hinges to the PVC frame, allowing the structure to be easily opened and closed. Ensure the hinges are strong enough to support the weight of the frame and cover.
Step 5: Installing the Plastic Cover
Drape the plastic cover over the PVC frame, ensuring it is taut and evenly distributed. Secure the cover to the frame using clips or ties, making sure it is tight enough to withstand wind but loose enough to allow for easy opening and closing.
Step 6: Securing the Hoophouse to the Raised Bed
Once the cover is in place, secure the entire structure to the raised bed using screws or additional clamps. This will prevent the hoophouse from shifting or being blown away in strong winds.
Tips for Maintaining and Using Your Hinged Hoophouse
Regularly check the structure for any signs of wear or damage, particularly after storms. Open the hoophouse on warm days to prevent overheating and ensure proper ventilation. In colder months, keep it closed to retain heat and protect your plants from frost.
Conclusion: Enjoying the Benefits of Your Hinged Hoophouse
With your new hinged hoophouse, you can enjoy a longer growing season and healthier plants. This simple yet effective structure provides protection from the elements and pests, making it an invaluable addition to any raised bed garden. By following these steps, you can build a durable hoophouse that will serve your gardening needs for years to come.


