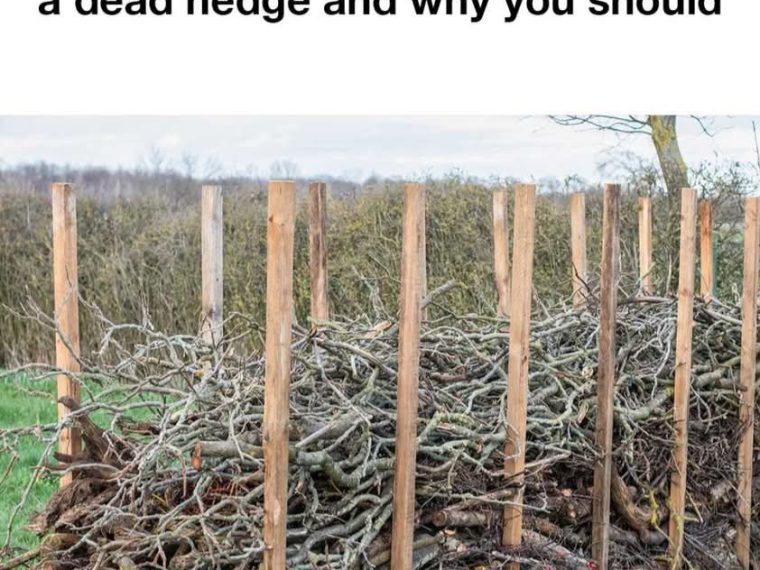
A dead hedge is a simple, eco-friendly structure made from branches, twigs, and other natural materials. It serves as a barrier or boundary in gardens and natural landscapes. Unlike traditional hedges, dead hedges do not require living plants, making them a low-maintenance option for gardeners. They are particularly useful in areas where traditional hedges struggle to grow due to poor soil conditions or lack of sunlight. Dead hedges have been used historically in Europe as a practical solution for fencing and habitat creation. They are gaining popularity today as people look for sustainable and wildlife-friendly gardening practices.
Benefits of Building a Dead Hedge
Dead hedges offer numerous benefits, both practical and ecological. They provide a habitat for wildlife, offering shelter and nesting sites for birds, insects, and small mammals. This can increase biodiversity in your garden. Additionally, dead hedges act as windbreaks, reducing soil erosion and protecting more delicate plants from harsh weather. They also recycle garden waste, turning pruned branches and twigs into a useful structure rather than sending them to landfill. Furthermore, dead hedges can enhance the aesthetic appeal of a garden, adding a rustic, natural look that blends seamlessly with the environment.
Understanding the Environmental Impact
The environmental impact of dead hedges is overwhelmingly positive. By using natural materials that would otherwise be discarded, dead hedges contribute to waste reduction. They also promote biodiversity by providing habitats for various species, which is crucial in urban and suburban areas where natural habitats are often limited. Dead hedges can improve soil health by acting as a windbreak and reducing erosion. They also help in carbon sequestration, as the decomposition process of the organic materials slowly releases carbon back into the soil, enriching it over time.
Materials Needed for a Dead Hedge
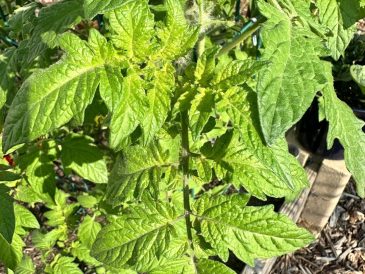
To build a dead hedge, you’ll need a variety of natural materials. The primary components are branches and twigs, ideally from hardwood trees like oak, beech, or ash, which decompose slowly. You’ll also need stakes or posts to support the structure; these can be made from sturdy branches or wooden poles. Additional materials can include leaves, smaller twigs, and other garden debris to fill gaps and add bulk. It’s important to use untreated wood to avoid introducing chemicals into your garden.
Step-by-Step Guide to Building a Dead Hedge
Building a dead hedge is a straightforward process that can be completed with minimal tools and materials. Follow these steps to create your own dead hedge.
Step 1: Selecting the Right Location
Choose a location that suits the purpose of your dead hedge. It should be an area where you need a barrier or want to enhance wildlife habitats. Consider factors such as sunlight, wind direction, and proximity to existing plants. Ensure the ground is relatively level to provide a stable base for your hedge.
Step 2: Gathering the Necessary Materials
Collect branches, twigs, and other organic materials from your garden or local area. Ensure you have a mix of thick and thin branches for structure and filling. Gather enough stakes or posts to support the length of your hedge, spacing them about 1-2 feet apart.
Step 3: Preparing the Ground
Clear the area of any debris or vegetation that might interfere with the stability of your hedge. If necessary, level the ground to ensure a stable base. Mark the outline of your hedge using stakes or string to guide your construction.
Step 4: Constructing the Base Layer
Begin by driving stakes or posts into the ground along the marked outline. These will form the backbone of your hedge. Use thicker branches to create the base layer, laying them horizontally between the stakes. Ensure they are tightly packed to provide a solid foundation.
Step 5: Adding Subsequent Layers
Continue adding layers of branches and twigs, alternating directions to increase stability. Use smaller twigs and leaves to fill gaps and add bulk. As you build up, ensure the hedge remains stable and compact. The height of the hedge will depend on its intended use, but typically ranges from 3 to 6 feet.
Step 6: Securing the Structure
Once the desired height is reached, secure the structure by weaving flexible branches around the stakes. This will help hold the materials in place and prevent them from shifting. Check for any loose areas and add additional materials as needed.
Step 7: Maintaining Your Dead Hedge
Dead hedges require minimal maintenance. Over time, the materials will decompose and settle, so periodically check for stability and add new materials as needed. This is also an opportunity to incorporate fresh garden waste, keeping the hedge robust and functional.
Common Mistakes to Avoid
Avoid using treated wood or materials that could introduce chemicals into your garden. Ensure the hedge is compact and stable to prevent collapse. Don’t neglect the base layer, as a weak foundation can compromise the entire structure. Regularly check for gaps or instability, especially after storms or high winds.
Conclusion: Enhancing Your Outdoor Space with a Dead Hedge
Dead hedges are a sustainable, eco-friendly solution for gardeners looking to enhance their outdoor spaces. They provide numerous ecological benefits, from promoting biodiversity to reducing waste. By following the steps outlined above, you can create a beautiful, functional dead hedge that supports wildlife and adds a natural aesthetic to your garden. Embrace this traditional technique to contribute positively to your local environment and enjoy the benefits of a thriving, biodiverse garden.