Potatoes are among the most popular and versatile vegetables in the world. From mashed potatoes to roasted ones, their creamy texture and rich flavor make them a kitchen staple. While you might be familiar with the standard white potato, have you ever considered grow red potatoes? With their distinctive red skin and creamy, waxy flesh, red potatoes can be an excellent addition to any home garden.
Whether you’re a seasoned gardener or a beginner, growing red potatoes is relatively easy, provided you follow the right steps. This guide will walk you through everything you need to know about planting, caring for, and harvesting red potatoes. By the end of this post, you’ll be ready to cultivate your own bumper crop of delicious red potatoes.
- 1. Understanding Red Potatoes and Their Varieties
- 2. Choosing the Right Location and Soil for Red Potatoes
- 3. How to Plant Red Potatoes
- 4. Caring for Red Potatoes Throughout the Growing Season
- 5. Harvesting Red Potatoes
- 6. Storing and Using Red Potatoes
- 7. Troubleshooting Common Problems When Growing Red Potatoes
- 8. Tips for Growing Red Potatoes Successfully
- Conclusion
- Author
1. Understanding Red Potatoes and Their Varieties
What Are Red Potatoes?
Red potatoes, as their name suggests, are characterized by their reddish skin and creamy white flesh. Unlike starchy potatoes (such as Russets), red potatoes are classified as waxy potatoes. This means they have a lower starch content and higher moisture, making them ideal for boiling, steaming, and roasting. The waxy texture helps them hold their shape, making them perfect for dishes like potato salad or roasted red potatoes.
Their taste is subtly sweet and earthy, with a smooth texture when cooked. This makes red potatoes a favorite for various culinary applications, from soups and stews to baked dishes and mashed potatoes.
Popular Varieties of Red Potatoes
There are several varieties of red potatoes, each with its own unique characteristics. Here are some of the most common types you might encounter:
- Red Pontiac: One of the most popular red potato varieties, Red Pontiac potatoes are large, round, and have smooth red skin. Known for their versatility, they are great for baking, boiling, and mashing. They’re also resistant to diseases like blight and scab.
- Norland: Early maturing, Norland red potatoes are perfect for gardeners who want a quick harvest. They’re typically smaller, with smooth, thin skin and white flesh. This variety is also resistant to common potato diseases.
- Red LaSoda: This variety is known for its resistance to pests and diseases, making it a great choice for organic gardeners. It produces medium-sized potatoes that are excellent for storage.
- Chieftain: Known for its smooth texture and vibrant red skin, Chieftain potatoes are perfect for mashed or roasted potato dishes. They have a somewhat waxy texture, making them ideal for dishes that require firm potatoes.
Each of these varieties has its own advantages, so choose the one that best fits your garden’s needs and your culinary preferences.
2. Choosing the Right Location and Soil for Red Potatoes
Ideal Growing Conditions
Red potatoes thrive in well-drained soil with a slightly acidic to neutral pH (around 5.5 to 6.5). The key to growing healthy red potatoes is ensuring that the growing environment is suitable for their needs. Here are some factors to keep in mind:
- Sunlight: Potatoes require at least 6 hours of direct sunlight each day. Choose a spot in your garden that gets full sun for most of the day. If you’re planting in a container, place it in a sunny location on a patio or balcony.
- Soil Type: Red potatoes grow best in loamy, well-draining soil. Avoid heavy clay soils, as they retain too much water and can cause the potatoes to rot. Adding organic matter, such as compost, will improve soil structure, water retention, and nutrient content.
- Soil pH: A slightly acidic soil pH is optimal for red potatoes. Use a soil testing kit to check the pH of your garden soil. If the soil is too alkaline (pH above 7), consider adding organic amendments like peat moss or sulfur to lower the pH.
Preparing Your Garden Bed
Before planting your red potatoes, you need to prepare the soil. Here’s how:
- Loosen the soil: Use a garden fork or tiller to break up compacted soil. Potatoes need loose soil for their tubers to grow freely and without restriction.
- Amend the soil: Add plenty of organic matter, such as compost, well-rotted manure, or a slow-release fertilizer to improve soil fertility. Organic matter also helps retain moisture while promoting drainage.
- Create mounds: Mounding the soil or planting potatoes in raised beds is a common practice. The mounds help with drainage and encourage healthy potato growth by exposing the tubers to sunlight as they develop.
Container Gardening for Red Potatoes
If you’re limited on space or don’t have access to an ideal garden plot, you can still grow red potatoes in containers or grow bags. This method works especially well in urban gardens or on balconies. Choose a container that’s at least 12 inches deep and wide enough to accommodate the potato plants.
3. How to Plant Red Potatoes
When to Plant
The best time to plant red potatoes is in early spring, about 2 to 4 weeks before the last expected frost date. You want to wait until the soil has warmed up to around 45°F to 50°F (7°C to 10°C). If you live in a warmer climate, you may be able to plant potatoes earlier.
Selecting Seed Potatoes
Always use certified seed potatoes rather than store-bought potatoes, as seed potatoes are disease-free and less likely to harbor pests. You can find certified seed potatoes at garden centers, online retailers, or from local farmers.
- Cutting Seed Potatoes: If your seed potatoes are large, you can cut them into pieces, but each piece should have at least one or two eyes (the small dimples where the plant sprouts). Allow the cut pieces to dry for 1-2 days before planting to prevent them from rotting.
Planting Method
- Depth: Plant your seed potatoes about 4 to 6 inches deep. This depth helps prevent the tubers from being exposed to sunlight, which can cause them to turn green and become toxic.
- Spacing: Space the seed potatoes 12 inches apart in rows. If you’re planting in containers or raised beds, space them accordingly to allow for good air circulation and root development. Keep rows at least 30 to 36 inches apart to ensure enough room for the plants to grow.
Watering Needs
Potatoes require a lot of water, especially during their growing season. Keep the soil consistently moist but not waterlogged. Red potatoes typically need about 1-2 inches of water per week, either from rainfall or irrigation. Water deeply but infrequently to encourage deep root growth.
4. Caring for Red Potatoes Throughout the Growing Season
Watering and Mulching
Red potatoes need consistent moisture to thrive. During dry spells, you may need to water your plants more frequently. Using mulch around the base of your plants will help retain moisture, prevent weeds, and regulate soil temperature. Straw, leaves, or grass clippings are great organic mulching materials.
Fertilization
Red potatoes don’t require excessive fertilization, but adding the right nutrients at key times can boost growth and yield. Here’s how:
- At planting: Use a balanced fertilizer or compost when you plant your seed potatoes to ensure they have all the essential nutrients to start.
- When plants are 6-8 inches tall: Apply a side dressing of low-nitrogen fertilizer. Too much nitrogen will result in excessive foliage growth at the expense of the tubers.
Pest and Disease Control
Red potatoes are susceptible to a few pests and diseases, but with proper care, you can minimize these risks.
Common Pests:
- Colorado Potato Beetles: These voracious pests can damage potato plants by feeding on the leaves. Hand-pick beetles and larvae, or use insecticidal soap or neem oil.
- Aphids: These tiny insects can stunt plant growth and spread diseases. Use insecticidal soap or introduce natural predators like ladybugs.
Common Diseases:
- Late Blight: This fungal disease causes brown spots on leaves and stems. Prevent late blight by practicing crop rotation, using disease-resistant varieties, and avoiding overhead watering.
- Potato Scab: This bacterial disease causes rough, dark lesions on tubers. To prevent it, ensure the soil is well-drained and not too alkaline.
Prevention Tips:
- Rotate crops: Don’t plant potatoes in the same soil year after year to prevent the buildup of pests and diseases.
- Remove dead plants and debris: Clean up plant residues after the growing season to reduce the risk of diseases.
Hilling Up
As your potato plants grow, you’ll notice that they start to send out long stems (also called “vines”) that spread across the soil. Once the plants reach about 6-8 inches in height, hill up the soil around the base of each plant. This will encourage additional tubers to form and prevent any developing potatoes from being exposed to sunlight, which can cause them to turn green and inedible.
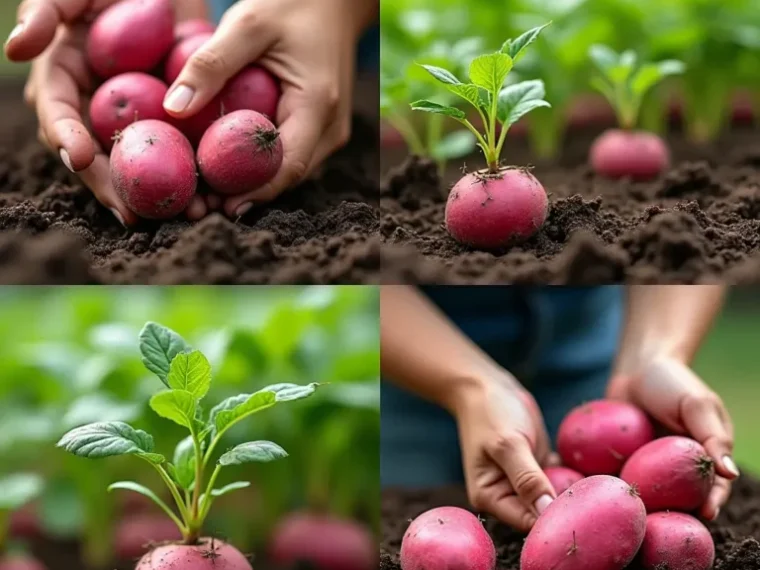
5. Harvesting Red Potatoes
When to Harvest
Red potatoes are usually ready for harvest about 70 to 90 days after planting, depending on the variety. The best indicator that it’s time to harvest is when the leaves of the plants turn yellow and start to die back. This means the potatoes are mature and ready for harvesting.
How to Harvest
Use a garden fork or a spade to gently lift the potatoes out of the soil. Be careful not to damage the tubers, as even small nicks can cause the potatoes to spoil. Start digging a few inches away from the plant to avoid piercing the tubers.
After harvesting, remove any excess dirt and allow the potatoes to cure for several days in a cool, dry, and dark place. This will help toughen the skins and extend their shelf life.