Sweet potatoes are a delicious and nutritious root vegetable that can be grown in small spaces, making them perfect for container gardening.
Growing sweet potatoes in containers is not only convenient but also allows you to control soil quality and conditions, resulting in a larger and healthier harvest.
In this guide, we’ll take you through the best method to grow sweet potatoes in containers, from choosing the right container to harvesting your sweet bounty.
Follow these steps and soon you’ll be harvesting homegrown sweet potatoes that are perfect for cooking, baking, and roasting.
Step 1: Choose the Right Container
The first step in growing sweet potatoes successfully in containers is selecting the right type and size of container.
Sweet potatoes need plenty of space for their roots to expand, so the size and depth of the container are crucial for a good yield.
Container Requirements:
- Size: Choose a container that is at least 15-20 gallons in size and 12-18 inches deep. The larger the container, the more room the roots have to grow, which means more sweet potatoes.
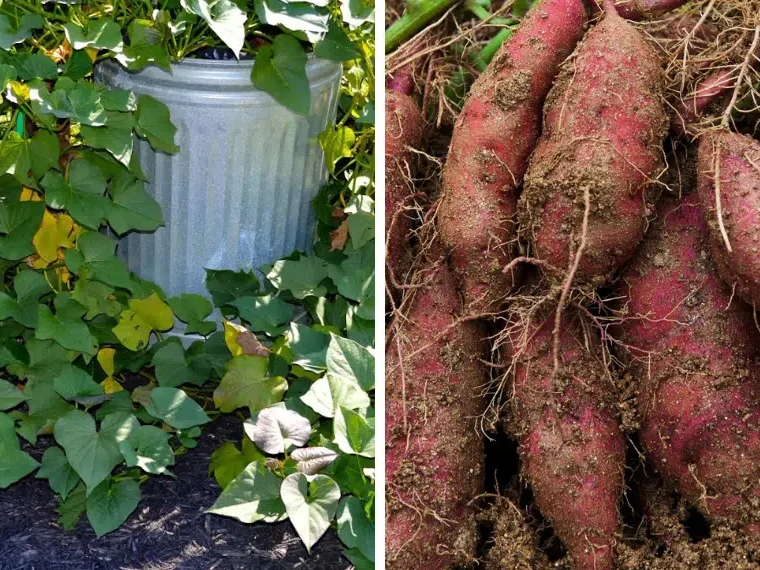
- Material: Containers can be made of plastic, fabric, or clay. Fabric grow bags are particularly popular for sweet potatoes because they allow for excellent drainage and air circulation, which helps prevent root rot.
- Drainage: Ensure that your container has adequate drainage holes to prevent water from pooling at the bottom, as sweet potatoes do not tolerate soggy soil.
Step 2: Prepare the Soil Mix
Sweet potatoes thrive in loose, well-draining soil that is rich in organic matter. Preparing the right soil mix is essential for a healthy crop.
Avoid using garden soil alone, as it can become compacted in containers and hinder root growth.
Ideal Soil Mix:
- Soil: Use a high-quality potting mix combined with well-rotted compost or aged manure.
- Perlite or Sand: Add perlite or coarse sand to improve drainage and prevent soil compaction.
- Fertilizer: Mix in a balanced slow-release fertilizer (such as 10-10-10) to provide the nutrients needed for healthy growth.
Tip: Sweet potatoes prefer slightly acidic soil with a pH of 5.8 to 6.2. You can test your soil and adjust as needed using soil amendments.
Step 3: Select the Right Sweet Potato Variety
Some sweet potato varieties are better suited for container growing than others. Look for compact or bush varieties that are known to perform well in small spaces. Common varieties for containers include:
- ‘Beauregard’: A popular variety with high yields and sweet flavor.
- ‘Bush Porto Rico’: A compact bush variety ideal for containers.
- ‘Georgia Jet’: Known for its fast-growing nature and high productivity.
You can also start your sweet potatoes from slips, which are young shoots that sprout from mature sweet potatoes. Slips can be purchased from nurseries or grown at home from store-bought sweet potatoes.
Step 4: Plant the Sweet Potato Slips
Planting sweet potato slips correctly is crucial for ensuring strong root development and a good harvest.
Planting Process:
- Fill the Container: Fill your container with the prepared soil mix, leaving about 2-3 inches of space at the top.
- Create Planting Holes: Make small holes in the soil about 4-6 inches deep and 12 inches apart if planting multiple slips in the same container.
- Plant the Slips: Place each sweet potato slip in a hole, ensuring that the lower leaves are buried and the roots are well-covered with soil. Gently press the soil around the slip to secure it.
- Water Thoroughly: After planting, water the slips thoroughly to help them establish in the soil.
Tip: If growing multiple slips in the same container, be mindful of spacing to prevent overcrowding and ensure each plant has room to spread its roots.
Step 5: Provide Proper Watering and Care
Consistent watering and care are key to growing sweet potatoes successfully in containers. They need enough water to keep the soil evenly moist but not waterlogged.
Watering Guidelines:
- Frequency: Water your sweet potatoes once or twice a week, depending on the weather and soil moisture. Increase watering during hot, dry periods.
- Moisture Check: Check the soil moisture regularly by sticking your finger about 2 inches into the soil. If it feels dry, it’s time to water.
- Avoid Overwatering: Make sure excess water can drain out of the container to prevent root rot.
Step 6: Support Growth with Fertilizer
To encourage healthy growth and abundant yields, fertilize your sweet potatoes throughout the growing season.
Fertilizing Tips:
- Initial Fertilization: Use a balanced, all-purpose fertilizer when preparing the soil mix.
- Mid-Season Boost: Once the plants are established and vines start growing, switch to a low-nitrogen fertilizer, such as 5-10-10, to promote root development rather than leafy growth.
- Frequency: Fertilize every 4-6 weeks during the growing season.
Tip: Avoid over-fertilizing with nitrogen, as it can result in lush foliage but fewer sweet potatoes.
Step 7: Control Pests and Diseases
Sweet potatoes grown in containers are less prone to pests and diseases compared to those grown in the ground. However, you should still monitor for common issues like:
- Aphids: Small insects that feed on leaves and can stunt plant growth.
- Spider Mites: Tiny pests that cause yellowing and webbing on leaves.
- Root Rot: Caused by overwatering and poor drainage.
Prevention and Treatment:
- Remove any affected leaves or pests manually.
- Use organic insecticidal soap or neem oil to treat pest infestations.
- Ensure proper drainage and avoid overwatering to prevent root rot.
Step 8: Harvest Your Sweet Potatoes
Sweet potatoes are typically ready to harvest 90-120 days after planting, depending on the variety. The leaves will start to yellow, indicating that the tubers are mature.
Harvesting Tips:
- Gently loosen the soil around the base of the plants using your hands or a small garden fork.
- Carefully lift the plants and remove the sweet potatoes from the soil.
- Brush off excess dirt, but do not wash the sweet potatoes until you’re ready to use them, as this can reduce their storage life.
Tip: Let the harvested sweet potatoes cure in a warm, humid place for about 7-10 days. This process allows the skins to harden and the sweetness to develop, improving flavor and storage life.
Growing sweet potatoes in containers is a rewarding experience that offers the opportunity to enjoy a homegrown harvest, even in small spaces.