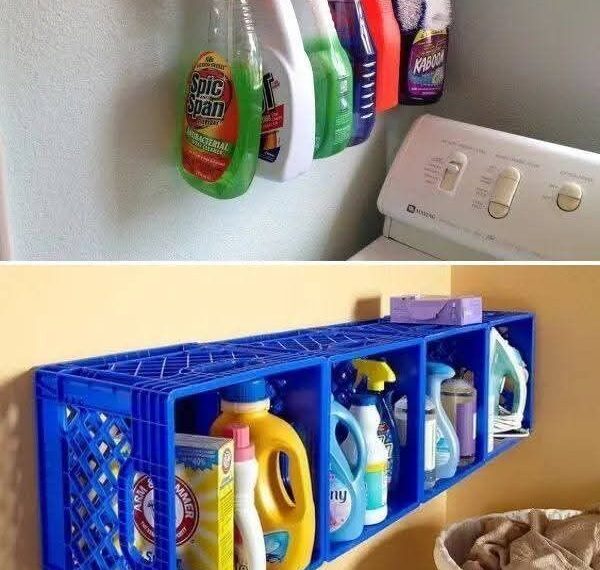
How to Turn Plastic Crates into Wall Shelves 🧱📦
A Simple, Budget-Friendly DIY Idea for Your Home
Plastic crates can be transformed into stylish and functional wall shelves with just a few tools. Whether you want extra storage in your kitchen, bedroom, or garage, this is an easy and affordable solution.
🛠️ Tools & Materials You’ll Need
- Sturdy plastic crates
- Drill
- Screws and wall anchors (depending on your wall type)
- Screwdriver
- Level (to keep things straight)
- Pencil for marking
🔩 Method 1: Direct Wall Mount (Strongest Option)


Steps:
- Choose the position on your wall.
- Hold the crate in place and mark the drill points with a pencil.
- Drill holes into the wall at the marked spots.
- Insert wall anchors if your wall is concrete or brick.
- Screw the crate directly into the wall from the inside.
- Check that it is secure and level.
✔ Best for holding moderately heavy items.
🔧 Method 2: Using Metal Brackets (Extra Support)


Steps:
- Install metal brackets onto the wall.
- Place the crate on top of the brackets.
- Secure the crate to the brackets if needed.
✔ Adds stability and gives a cleaner, more polished look.
🪢 Method 3: Hanging with Rope (Lightweight & Decorative)


Steps:
- Drill holes in the corners of the crate.
- Thread strong rope through the holes and tie securely.
- Hang from wall hooks.
✔ Ideal for decoration or lightweight storage only.
💡 Helpful Tips
- Always match screws and anchors to your wall type (concrete, drywall, etc.)
- Avoid placing heavy items unless the mounting is strong
- Arrange crates creatively (grid pattern or staggered design)
- Paint or decorate the crates for a stylish finish
✨ Final Result
With this simple DIY project, you’ll create practical and attractive wall shelves at almost no cost.
✔ Better organization
✔ Smart use of space
✔ Unique decorative touch
If you’d like, I can also give you creative ideas to decorate your crate shelves like a pro 😉