
Step-by-Step Guide
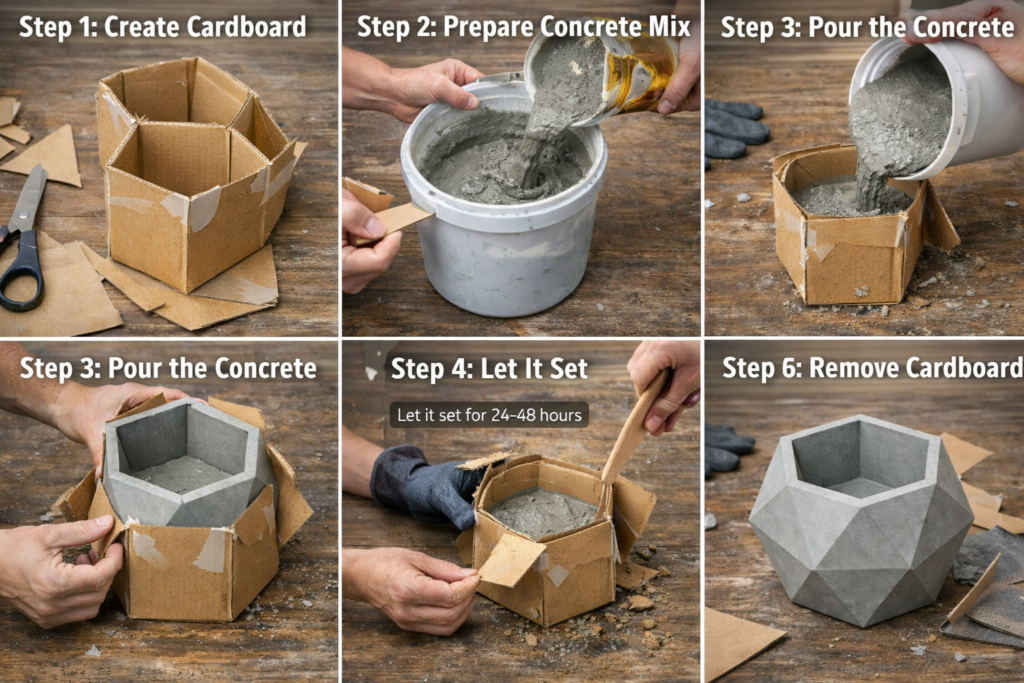
Step 1: Create Your Cardboard Mold
Cut your cardboard into geometric panels (hexagon shapes work great). Tape them together tightly to form your outer mold.
- Make sure all edges are sealed well to prevent leaks.
- For the inner hollow space, create a smaller shape and place it inside.
👉 This is what gives your planter that hollow interior.
Step 2: Prepare the Concrete Mix
In a bucket, mix your concrete with water according to the instructions.
- Aim for a thick, pourable consistency (like pancake batter).
- Stir thoroughly to remove lumps.
💡 tip: A pre-measured concrete mix makes this step much easier, especially for beginners.
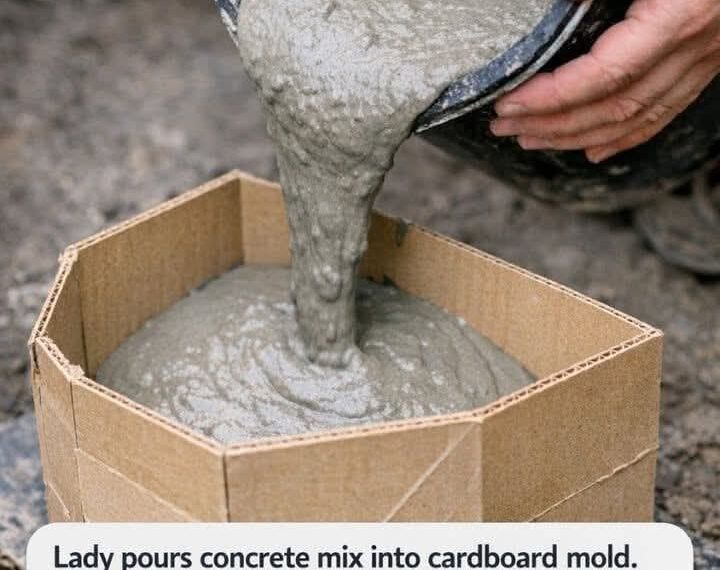
Step 3: Pour the Concrete
Slowly pour the mixture into your cardboard mold.
- Tap the sides gently to release air bubbles.
- Make sure the inner mold stays centered.
👉 This step is key for achieving that smooth, professional finish.
Step 4: Let It Set
Allow the concrete to cure for 24–48 hours.
- Keep it in a dry, stable place.
- Avoid moving it during this time.
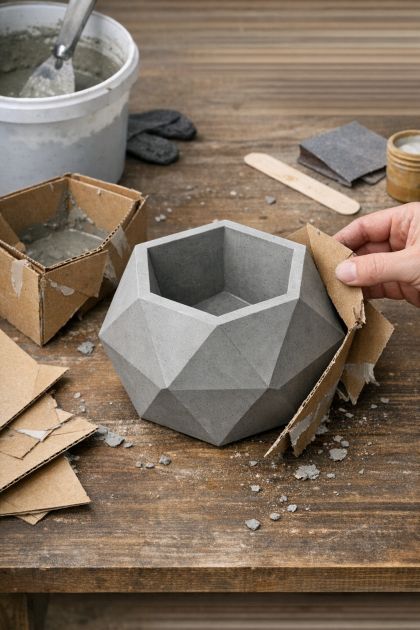
Step 5: Remove the Cardboard
Once fully hardened:
- Carefully tear away the cardboard mold.
- Use a utility knife if needed.
You’ll start to see that beautiful geometric shape emerge.
Step 6: Sand and Finish
Smooth out rough edges using sandpaper.
Optional finishing touches:
- Seal with a concrete sealer
- Paint or leave raw for a modern look
Pro Tips for a Luxury Look
- Use fine concrete mix for smoother surfaces
- Apply a light oil inside the mold for easy removal
- Experiment with different shapes (triangles, hexagons, diamonds)
- Add pigments for custom colors
💡 tip: A concrete sealer spray can give your piece that polished, store-bought appearance while protecting it from moisture.
Where to Use Your Concrete Piece
This DIY isn’t just a planter—you can use it for:
- 🌿 Succulent arrangements
- 🕯️ Candle holders
- 🏡 Outdoor table décor
- 🎁 Handmade gifts
Final Thoughts
What makes this project so satisfying is the transformation—from simple cardboard to a sleek, modern concrete piece that looks incredibly expensive.
With just a few materials and a bit of patience, you can create something that rivals high-end décor stores—while adding a personal touch to your home or garden.


